Hello Beautiful Stitchers! It is an utterly beautiful autumn day here in Perth and my fingers are itching to be stitching. But before I allow myself that luxury, I wanted to share an idea that has been making my brain buzz with excitement all day 🙂
As an embroidery designer I have worked hard over the last few years to find my own style – to bring together my favourite colours, stitches, fabrics, patterns and ideas to create something which is truly my own. The most wonderful comment came through on my Instagram feed yesterday which helped me to feel like I might finally be achieving that creative goal.
[quote]I always know which posts are yours, even before I see your profile name. I love your work![/quote]
I was doing the biggest happy dance, I can tell you. I was so excited!!! All the time and effort I had put into learning my craft, challenging myself to create my own designs, finding those creative intersections that really made my heart sing – it had all been worth it! And a really big part of that has been and continues to be making A LOT of mistakes.
Why mistakes I hear you ask? Well the mistakes have helped me to learn, they sometimes throw open unexpected doors, and they always stretch me to try something new – “Okay, so that didn’t work. But I still really want to create this vision I have in my head, so what can I do differently?”
Let me share with you an example that is challenging me right now. I really want to work out a beautiful and simple way to mount small pieces of canvaswork embroidery as jewellery. One of my goals is to use this as a teaching project, so it is particularly important that the mounting process needs to be easily reproduced in a classroom situation.
Step 1 – Creating the embroidery was fairly straighforward. I decided to work on Chinese silk gauze fabric using some divine flat silk threads. So far, so good.

Step 2 – With no jewellery experience at all I needed to find out how people were mounting embroidered pendants and brooches. There are lots of different examples and supplies available, but I decided that my first step would be to try a pendant tray – either square or rectangular. A lovely afternoon spent browsing options on Etsy found me ordering a mixed selection from an Australian supplier, Little Red Raspberry.

Step 3 – Now I needed to mount the embroidery in the tray. I laced the embroidery onto an acid free card base with a layer of pure wool felt for padding. The silk gauze is a very thin fabric so this worked quite well – there was no unruly bulk on the back of my work. But once I mounted it in the tray it was sitting too proud – and there was a line of unsightly white fabric showing at the edges. It really wasn’t matching the vision in my head just yet! But nevertheless, it was my first attempt and I knew I could easily fix the problem by lacing onto a thinner base next time around.

Step 4 – I figure that it is no good having an embroidered pendant or brooch if it is too fragile to wear, so it was time to wear it – yay! Ahhhhh – Houston we have a problem. After only a couple of hours, one of the threads had pulled loose.

And that is where I am up to at the moment. The short stitch lengths have survived the wearing test quite well whereas the long ones clearly have not. Perhaps I just need to change my stitch design? But I love the look of those long flat silk threads – the light plays so beautifully off them. Can I find a jewellery mount where the whole embroidery would sit behind glass? Or is there a spray sealant I can use to protect the embroidery? Or could you put the embroidered piece into the bottom of the tray and cover it with a glass cabochon? Or perhaps even fill it with resin? (The embroidery purists are gasping in horror at this point!).
I suspect that there are going to be many more mistakes and dead ends before I get this to work just the way I want. But that really is the point of today’s post. You have to keep making mistakes until the outcome matches the creative vision in your head. And will it be worth it? Absolutely!
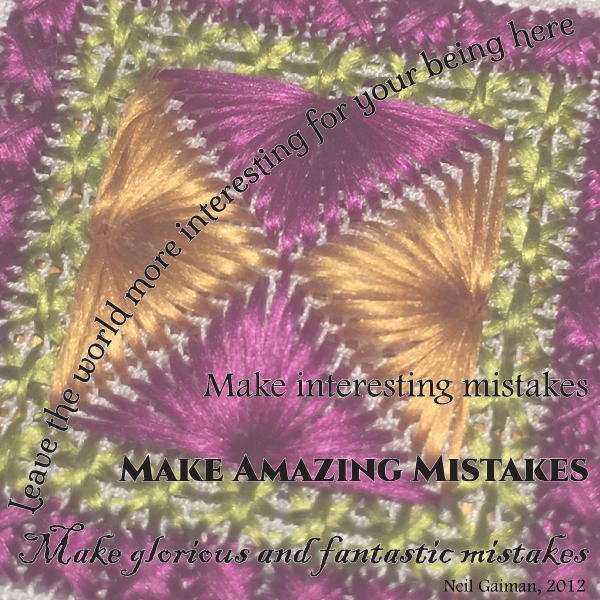
In case you need some extra convincing, take the time to watch this wonderful video of Neil Gaiman’s address to Philadelphia’s University of the Arts Class of 2012.
In one of those moments of serendipity, this video turned up via my Facebook feed this morning. I was interested because I am currently reading Amanda Palmer’s book, The Art of Asking (Amanda and Neil are married). I hesitate to admit that until I read Amanda’s book, I had never heard of Neil Gaiman at all. But I confess that I have rapidly become a huge fan of them both – mostly because there is a wonderful honesty about their creative process. I could quote whole tracts of Neil’s speech verbatim, because the whole thing is so inspiring. But here are the snippets that are important for you today.
[quote]If you have an idea of what you want to make, what you were put here to do, then just go and do that. ….I hope you’ll make mistakes. If you’re making mistakes, it means you’re out there doing something. And the mistakes in themselves can be useful. ….And now go, and make interesting mistakes, make amazing mistakes, make glorious and fantastic mistakes. Break rules. Leave the world more interesting for your being here. Make good art.[/quote]

So, this is what I wish for you too. If you want to create your own embroidery designs and feel that you don’t have the talent or skill to do it, then please think again. The fact that you want to create your own designs means that you are already halfway there. Now you just need to give it time, do lots of creating, make lots of mistakes and learn from them. I guarantee that it will be worth it!


A brilliant post Ann-Marie! I struggled with this for the longest time being a born perfectionist (I was the girl that cried when she got Bs), now I know there is more satisfaction in perfecting rather than perfection! You learn so much more from your mistakes which you then take forward into your next stitch or your next piece. I so enjoy your IG feed and I love your style – so inspiring and so individual!
Amanda, thankyou so much for your lovely comment. I love that IG is helping me to find new sewing friends all around the world 🙂 I think embroidery has the tendency to attract us perfectionist types and we just have to learn to let it go eventually. It took me until my 40s but I figure that means I still have half a lifetime to keep stretching my creativity!
Ann-Marie!
What a lovely post this is. I was already a huge fan of you and your work and now am officially a follower of your blog. I can’t believe I wasn’t already, but now I am die-hard!! ♡ Such a great read, Ann-Marie, for my creative soul and a feast for my eyes!! Thanks, friend!!
xoxoxo
Nancy
Nancy – I seriously need to come and visit you one day – you are so good for my soul 🙂 I have just heard from a US needlework shop that wants to stock my patterns, so maybe that is not as much of a pipe dream as it seemed to be a few days ago! AMxx
Hi, I’ve recently found your blog. I love what I’ve seen so far.
I just wanted to suggest some iron-on interfacing on the back of the piece maybe?
Hi Amanda, thankyou so much for your comments and the suggestion (and apologies for my slow reply – I have been away for a few days :)). I have found some new pendant settings for these pieces which has made it easier for me to mount than in these trays, but I’ll definitely remember iron-on interfacing for future reference.